Happy spring friends!
Or should we say winter part II. Philly is currently stuck in a never ending snow globe and we are SO ready for some spring weather to say the least. Currently accepting complimentary flights to anywhere with sunny and warm weather. Preferably Cali or Hawaii, but beggars can't be choosers I suppose.
In an effort to ward off the snow, we made a spring floral wreath using flowers from our favorite local florist, Kelly at Bloom Flower Co. It literally takes three different supplies and your creativity. This can totally work with faux flowers if you want a lasting look through the whole season.
M A T E R I A L S
+ Fresh or faux flowers and greens - gather a variety for a unique look!
+ Natural grapevine wreath - we bought ours from Kelly, our local florist, but you can find these at your local craft store or on Amazon
+ Scissors or pruning shears
S T E P O N E
Start by cutting and setting aside the flowers and greens you will be using on the wreath. The greens will hold up for a while versus the more delicate flowers, like the cottage roses we used, that will dry pretty quickly. If you're making this for a special event we would recommend putting it together the day of or day before and spraying the flowers with water throughout the day. This way the flowers still look as fresh and alive as possible!
S T E P T W O
While the wreath is laying down on the table start by sticking in layers of greens and wax flowers. The wax flowers will dry nicely along with the greens. Layer the more delicate flowers on top for texture and dimension.
^ it ain't all pretty– it can get a bit messy!
Voila! You have yourself a fancy new floral wreath. The flowers can be swapped out for a different look each season or whenever you want so you can get your moneys worth on that wreath. Tag @rayandablog on Instagram so we can see your creations!
#sofreshandsoclean
Showing posts with label DIY. Show all posts
Five DIY Valentines
Monday, February 12, 2018
Whether you're hard-core pro-Valentine's Day or 100% anti heart day, or somewhere in between celebrating Galentine's Day, we've got some fun last-minute Valentine DIYs anyone can whip up for their boo, gal pal or freshly-delivered pizza.

x x x
1. Valentine Coupons


A modern take on those love coupons everyone used to give their mom when they didn't have money to buy her gifts– but you can personalize them with basically anything you want!
x x x
2. Scrap Paper Valentines


Don't throw those random paper scraps away– use 'em to create some quirky little Valentines instead! Simply cut out some hearts, draw on your faces, and decorate to your heart's content!
x x x
3. Wild About You


Probably our favorite one– I mean who doesn't love a DIY that involves mini plastic animals?! We grabbed some scrap card stock, a brush and some black paint and painted the zebra stripes, then added our little message at the top. Poke 2 little holes to string the twine through, and voila! A valentine fit for a king (of the jungle)
x x x
4. We're a Great Match


This one's super easy– we just took a box of matches, cut a piece of paper to size, and wrapped/taped it around the box... so quick and simple! Write a little message on there, and you're good to go! Also how cute is this candle from Annie Seo?! Can't find the strength to burn it (probably ever...)
x x x
5. Animal Envelopes


Can't get much easier than this– take some colored construction paper and cut out some ears (of course a cat was our first choice) then doodle on a face with a Sharpie, and you're done! Slip a little note or card inside, too!
There you have it friends, five easy DIY Valentine's for everyone on your list! Have fun making them, and as always tag your projects with #rayandablog so we can see what you made!

x x x
1. Valentine Coupons


A modern take on those love coupons everyone used to give their mom when they didn't have money to buy her gifts– but you can personalize them with basically anything you want!
x x x
2. Scrap Paper Valentines


Don't throw those random paper scraps away– use 'em to create some quirky little Valentines instead! Simply cut out some hearts, draw on your faces, and decorate to your heart's content!
x x x
3. Wild About You


Probably our favorite one– I mean who doesn't love a DIY that involves mini plastic animals?! We grabbed some scrap card stock, a brush and some black paint and painted the zebra stripes, then added our little message at the top. Poke 2 little holes to string the twine through, and voila! A valentine fit for a king (of the jungle)
x x x
4. We're a Great Match


This one's super easy– we just took a box of matches, cut a piece of paper to size, and wrapped/taped it around the box... so quick and simple! Write a little message on there, and you're good to go! Also how cute is this candle from Annie Seo?! Can't find the strength to burn it (probably ever...)
x x x
5. Animal Envelopes


Can't get much easier than this– take some colored construction paper and cut out some ears (of course a cat was our first choice) then doodle on a face with a Sharpie, and you're done! Slip a little note or card inside, too!
There you have it friends, five easy DIY Valentine's for everyone on your list! Have fun making them, and as always tag your projects with #rayandablog so we can see what you made!
Labels:
2018,
design,
DIY,
february,
love,
stationery,
valentines
DIY Mid Century Christmas Putz Houses
Tuesday, November 28, 2017
It's that time of year again, and this year we've got some pretty sweet DIY projects headed your way. We're super excited to share this one with you– inspired by our trip to LA and Palm Springs this summer, we took the classic Christmas 'putz houses' and gave 'em a modern, mid century twist!
Now before you freak out and say, 'Gosh... you're insane for cutting and building these mini houses... get a life already!' We'll partially agree in saying there could have been a better way of spending our time than spending a day making these houses, but on the other hand– these are freaking adorable and we reject your judgement, hah!
The best part about these is that there are templates online that you can print out to make whatever style house you want. Heck, go ahead and build an entire modern little village if you're feeling up for it! (*Side note, this woman is amazing and took the time to upload a bunch of different styles, so check 'em out!)
Um, look at this adorable little A-frame. We'll be moving in in 3-2-1...
These are simple to build once you have the template. We traced and cut ours out of the backs of old cereal boxes– cardboard sturdy enough to stand up without flopping over, but not so thick that you can't cut or fold without freaking out and throwing it across the room.
Mini bottle brush trees make anything look adorable and festive AF, so we definitely planted them with every putz house. For a more modern look, get some neon-colored trees, or just stick with the classic evergreen, cause it's Christmas.
For a little extra touch, we covered the backside of the 'windows' with some tracing paper, and placed a battery operated tea light inside each house for that cozy Christmas glow.
Adorable, right?!
Of course we made a mini paper car. Gotta get places, am I right?
We can't all be lucky enough to live in Palm Springs, but at least we can pretend with these lil' putz houses. Here's to the start of another holiday season!
Make sure you share your DIY's with us if you try them using #rayandablog– can't wait to see what you all come up with!
Labels:
2017,
Christmas,
DIY,
diyyourlife,
holiday,
holiday diy,
holiday spirit,
modern
DIY (NOT YOUR TYPICAL) FELT BANNER
Sunday, February 5, 2017
So you may be thinking, 'oh look, another felt banner.' Yes, this is a felt banner DIY, but it's next level. Why commit to one phrase when you can customize it to whatever you want whenever you want?! You may already have some of these supplies in your craft corner, but if not grab ten bucks and head to pick them up! In honor of February we used some cheesy love phrases.
M A T E R I A L S
+ Thick piece of felt
+ Wooden dowel
+ Felt letters
+ Sticky back Velcro
+ Glue gun
+ Scissors
+ Twine, ribbon or yarn to hang the banner
Cut the bottom corners of the felt banner making a point in the center of the felt. You may want to grab a ruler or something with a straight edge to help make this even.
S T E P T W O
Saw or snap the wooden dowel so that it is sticking out a bit further than the width of the felt banner. Flip the felt banner over and roll the wooden dowel into the felt. Use your glue gun to secure the felt onto the dowel and hold down for about ten seconds.
S T E P T H R E E
Using just the rough Velcro, begin to cut strips into squares to stick on the felt letters. The rough Velcro will stick to the felt banner while the softer strips of Velcro will not. Peel off the plastic on the back of the Velcro squares and stick onto the back corners of each felt letter.
S T E P F O U R
Line up the letters onto your felt banner, flip over and press down firmly so the Velcro sticks onto the felt.
Switch up the felt banner as often as you want for celebrations, holidays, countdowns and more! The possibilities are endless. Share your banners on Instagram and tag @rayandablog - we would love to see them!
#morebangforyourbuck
DIY: Plywood Letterboard
Friday, January 13, 2017
You've all seen the trendy letter boards and light boards from Letterfolk and Heidi Swapp, and don't get us wrong, they're pretty awesome. I mean, they're what inspired us to create a hybrid of the two!
You'll also need some transparency sheets, sandpaper and a pair of scissors.
Step 1. Take your dowels, and measure them against your plywood board, marking the width with a pencil.
Step 2. Cut the dowels with a handsaw or chop saw (or a very, very industrial pair of clippers). Sand the ends lightly until smooth.
Step 3. Using some E6000 glue, glue your dowels onto the board, spacing equally depending on how many lines of text you want.
Step 5. Start by cutting your transparency sheets into strips that fit in between your dowels. Then place the letters onto the strips you just cut, leaving enough space in between letters for equal spacing.
Step 6. Once you have all the letters cut out, time to play!
Now it's time to think of some snarky (or cute) quotes, and put 'em on display!
We'd love to see your own take on this DIY, so if you make it, share it! Tag your projects with #rayandablog
#sayitwithwords
Labels:
2016,
decor,
design,
DIY,
diyyourlife,
getcrafty,
letterboard,
plants
DIY FESTIVE FRINGE TREES
Friday, December 23, 2016
Well, we're literally just days away from Christmas at this point, and if you haven't done any decorating yet, 1. What's wrong with you?! 2. Don't you have any holiday cheer?!, 3. It's time to change that. This stupid easy (and dare we say glamorous) DIY will have your halls decked in no time at all!
M A T E R I A L S
+ Party hats
+ Pom poms
+ Fringe tape
S T E P O N E
Begin by wrapping the fringe tape layer by layer on the party hats starting from the bottom of the hat. If it creases a bit, perfectionists, don't worry, the next layer will cover it up!
S T E P T W O
Continue sticking on layers of fringe tape until you get to the top of the hat. Cutting the fringe tape once you get to the high part of the hat makes it easier to place!
S T E P T H R E E
Finish off the tree by adding a sparkly pom pom!
Want to double these as New Year's Eve hats? Keep the elastic string on the hat to wear! If you're still in need of last minute Christmas decorations check out the rest of our DIYs from the month of December.
#twoforone #getfestive
M A T E R I A L S
+ Party hats
+ Pom poms
+ Fringe tape
S T E P O N E
Begin by wrapping the fringe tape layer by layer on the party hats starting from the bottom of the hat. If it creases a bit, perfectionists, don't worry, the next layer will cover it up!
S T E P T W O
Continue sticking on layers of fringe tape until you get to the top of the hat. Cutting the fringe tape once you get to the high part of the hat makes it easier to place!
S T E P T H R E E
Finish off the tree by adding a sparkly pom pom!
Want to double these as New Year's Eve hats? Keep the elastic string on the hat to wear! If you're still in need of last minute Christmas decorations check out the rest of our DIYs from the month of December.
#twoforone #getfestive
DIY CERAMIC DOODLE ORNAMENTS
Wednesday, December 14, 2016
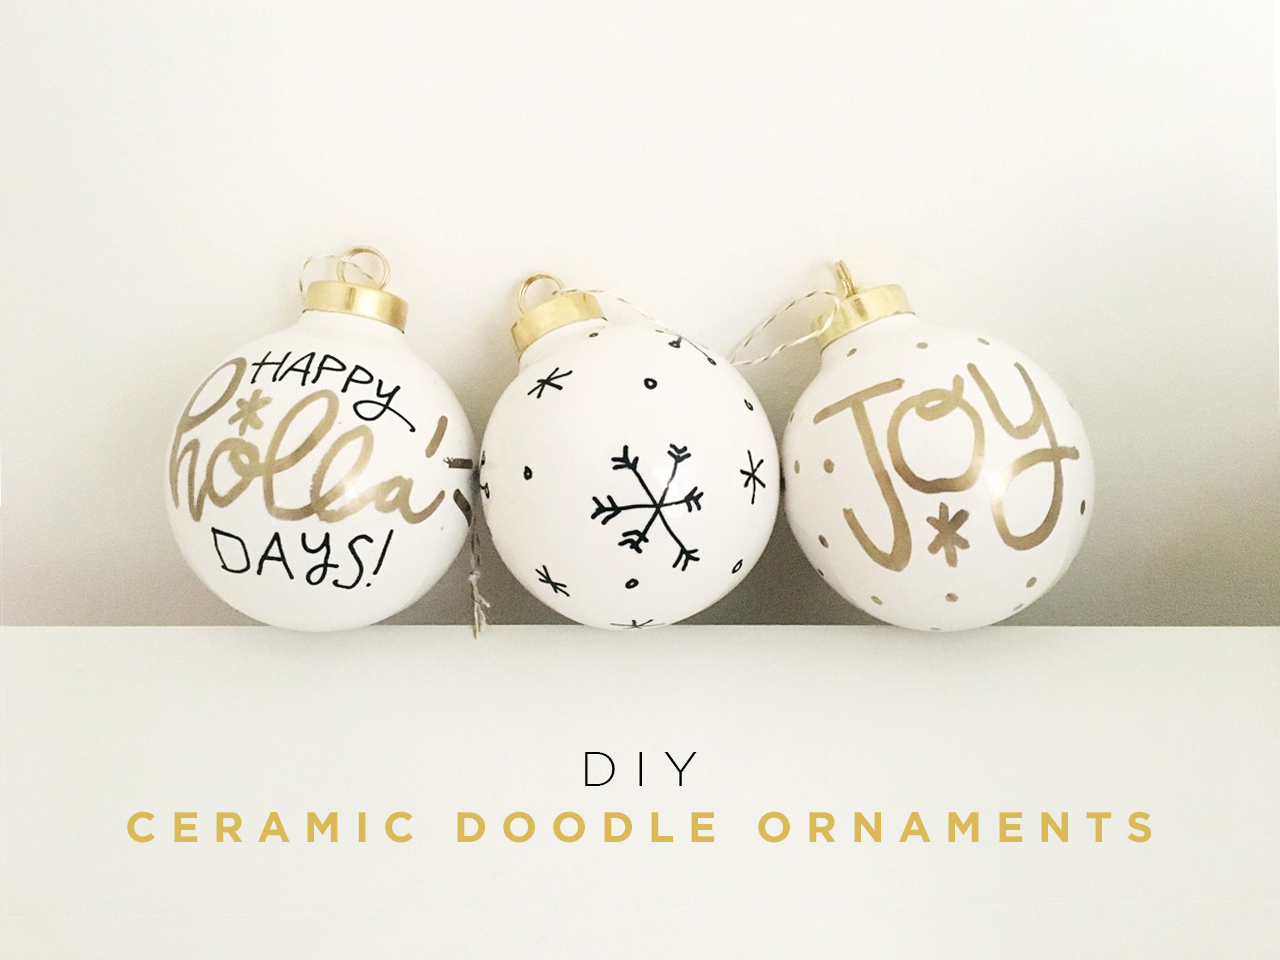
I don't know about you, but we've been making homemade ornaments since we were in grade school, and let's face it– they weren't all Instagram worthy to put it lightly. Now that we're older and can hold a marker the correct way, it's time to revisit the handmade ornament.
We'd love to see your creations– share them on Instagram and tag us @rayandablog
#doodlealltheway
Labels:
2016,
Christmas,
DIY,
diyyourlife,
getcrafty,
holiday spirit
DIY WINTER CAT ORNAMENT
Thursday, December 8, 2016
It's week two of our Christmas DIY, which means we're almost halfway through December! If you didn't already know we are as crazy as crazy cat ladies get, minus the home full of cats. To show our appreciation to our felines we made a Christmas ornament purrfect for any cat lover.
M A T E R I A L S
+ Open front plastic ornament
+ Cotton balls
+ Glue
+ Mini cat figurine
+ Spray paint
+ Mini bottle brush trees
+ Glitter
+ Twine or ribbon
S T E P O N E
Get your cat figurine and spray paint the color of your choice, we chose gold! Apply a couple coats and let dry in between. Choose a bright, poppy color for a retro or modern Christmas feel, or a metallic for a more classic holiday look.
S T E P T W O
Pull apart a couple cotton balls for the fluffy snow and lay them inside the ornament to make sure it fits nicely. Apply glue inside the ornament at the bottom and press down the cotton on top, let dry.
S T E P T H R E E
While the cat is drying, glue the mini bottle brush trees inside the ornament on top of the cotton. You might even want to pull apart the cotton to make an opening so they're secured to the bottom of the ornament.
S T E P F O U R
Glue the cat on top of the snow. Depending on how heavy the figurine is you will want to dig it deeper into the cotton so it doesn't fall over, or create a small opening like you did for the mini trees to secure to the bottom of the ornament.
S T E P F I V E
Sprinkle some festive glitter onto the cotton for a super fun, sparkly holiday touch. Don't forget to tie your favorite twine or ribbon to the top of the ornament!
We couldn't have done this DIY without the help of Rachel's cat, Butternut, who kept us on our toes while he proceeded to play with literally everything on the table– such a curious lil guy! Follow us on Instagram @rayandablog for more updates and fun!
#meowychristmas
M A T E R I A L S
+ Open front plastic ornament
+ Cotton balls
+ Glue
+ Mini cat figurine
+ Spray paint
+ Mini bottle brush trees
+ Glitter
+ Twine or ribbon
S T E P O N E
Get your cat figurine and spray paint the color of your choice, we chose gold! Apply a couple coats and let dry in between. Choose a bright, poppy color for a retro or modern Christmas feel, or a metallic for a more classic holiday look.
S T E P T W O
Pull apart a couple cotton balls for the fluffy snow and lay them inside the ornament to make sure it fits nicely. Apply glue inside the ornament at the bottom and press down the cotton on top, let dry.
S T E P T H R E E
While the cat is drying, glue the mini bottle brush trees inside the ornament on top of the cotton. You might even want to pull apart the cotton to make an opening so they're secured to the bottom of the ornament.
S T E P F O U R
Glue the cat on top of the snow. Depending on how heavy the figurine is you will want to dig it deeper into the cotton so it doesn't fall over, or create a small opening like you did for the mini trees to secure to the bottom of the ornament.
S T E P F I V E
Sprinkle some festive glitter onto the cotton for a super fun, sparkly holiday touch. Don't forget to tie your favorite twine or ribbon to the top of the ornament!
We couldn't have done this DIY without the help of Rachel's cat, Butternut, who kept us on our toes while he proceeded to play with literally everything on the table– such a curious lil guy! Follow us on Instagram @rayandablog for more updates and fun!
#meowychristmas
DIY CHRISTMAS COUNTDOWN
Sunday, December 4, 2016
To start off the month of December we made this little Christmas countdown for your home! All the supplies can be found at your local craft store and you may already have most of them in your craft drawers. We stood gushing over this adorable little wooden house smack in the middle of AC Moore, we were that excited. You can even customize the little house any way you want! We decided to keep the house in its nat-ur-al wooden state.
Set the blocks into the wooden house and you have yourself a Christmas countdown to display! We would love to see how you customize your own countdown. Tag us on Instagram @rayandablog
Keep an eye out for more Christmas crafts coming your way every week! We're getting realllll crafty this month, get ready...
M A T E R I A L S
+ Wood house
+ Two wood blocks
+ Spray paint
+ Paint pen
+ Baker's twine
+ Scrapbook paper
+ Scissors
S T E P O N E
Spray paint the blocks and let dry in between coats. Apply two or three coats. Let fully dry.
S T E P T W O
Start by cutting out triangles from scrapbook paper and space it out to say "Days til Christmas." Write a letter on each triangle and glue onto the baker's twine. Let dry. And let it be know– mini is better!
S T E P T H R E E
Glue the mini garlands onto the wooden house. (See? It's adorable.)
S T E P F O U R
After the blocks are fully dry, using the paint pen write on the numbers "0, 1, 2, 3, 4, 5" on the sides of one block and "0, 1, 2, 6, 7, 8" onto the sides of the second block.
Keep an eye out for more Christmas crafts coming your way every week! We're getting realllll crafty this month, get ready...
#christmascountdown
Subscribe to:
Posts (Atom)


