Showing posts with label crafts. Show all posts

DIY WINTER CAT ORNAMENT

Thursday, December 8, 2016

It's week two of our Christmas DIY, which means we're almost halfway through December! If you didn't already know we are as crazy as crazy cat ladies get, minus the home full of cats. To show our appreciation to our felines we made a Christmas ornament purrfect for any cat lover.


M A T E R I A L S

+ Open front plastic ornament
+ Cotton balls
+ Glue
+ Mini cat figurine
+ Spray paint
+ Mini bottle brush trees
+ Glitter
+ Twine or ribbon


S T E P   O N E

Get your cat figurine and spray paint the color of your choice, we chose gold! Apply a couple coats and let dry in between. Choose a bright, poppy color for a retro or modern Christmas feel, or a metallic for a more classic holiday look.

S T E P   T W O

Pull apart a couple cotton balls for the fluffy snow and lay them inside the ornament to make sure it fits nicely. Apply glue inside the ornament at the bottom and press down the cotton on top, let dry.

S T E P   T H R E E

While the cat is drying, glue the mini bottle brush trees inside the ornament on top of the cotton. You might even want to pull apart the cotton to make an opening so they're secured to the bottom of the ornament.

S T E P   F O U R

Glue the cat on top of the snow. Depending on how heavy the figurine is you will want to dig it deeper into the cotton so it doesn't fall over, or create a small opening like you did for the mini trees to secure to the bottom of the ornament.

S T E P   F I V E

Sprinkle some festive glitter onto the cotton for a super fun, sparkly holiday touch. Don't forget to tie your favorite twine or ribbon to the top of the ornament!


We couldn't have done this DIY without the help of Rachel's cat, Butternut, who kept us on our toes while he proceeded to play with literally everything on the table– such a curious lil guy! Follow us on Instagram @rayandablog for more updates and fun!

#meowychristmas

DIY: Re-Purposed Altoid Tins

Friday, March 25, 2016

We all know and love that notorious, classic green and gold tin known as Altoids, but what happens when those strong little mints are gone? Re-use it, people! We have three practical, easy-peasy ways to re-use your own collection of Altoids tins.

1. The Lil' Commuter's Travel Kit

Whether you take 3 trains a day, or drive 20 minutes to work, this little kit will have everything you need! Keys, change, bus fare, headphones, and a phone charger cord— you'll never be ill-prepared again! Toss it all in the tin, and throw it in your purse, and you're ready to go!


2. The Lil' Primp and Pamper Emergency Kit

We've all been in the situation where our hair just won't cooperate and we need a hair tie, or when our lips are (in the words of Napoleon Dynamite) FREAKING CHAPPED AND NEED CHAPSTICK. These little mint tins are perfect sizes for your everyday-hair and face-fixer needs!

Yes, that is cat chapstick, stop judging us...

3. The Lil' Sewing Kit (no, Grandma didn't make this for us)

Sewing seems to be a skill of the past, but it's time to put the needle to the thread and fix that little hole in your favorite sweater yourself. Keep some extra pieces of fabric or patches, some needles and a few mini thread spools in the tin so you'll never have to ask your mom to sew it for you again. Trust us, she'll thank you.


Our cats have sure been into our DIY's lately... that or they just want to be famous. Divas... 


#craftinacan

DIY: Rustic Painted Mason Jars

Monday, December 21, 2015

It's week three of our Christmas DIY countdown! This super simple DIY will give your home a rustic holiday look right away. While last week’s craft featured a DIY Christmas tree terrarium, this week we are using materials that you can totally find in your own home!
Mason jars always seem to be popping up all over Pinterest, crafts stores and even our own homes, so we decided to feature them this week in our DIY!

MATERIALS:

+ Mason Jar
+ Acrylic paint/spray paint
+ Twine
+ Fresh greens (you can get these from the trees in your backyard or your neighbor’s backyard, or at your local pop-up Christmas tree farm! Tip: Be sure to ask before creeping in anyone's yard to cut their trees...)

Step 1: Collect your jars — Big and small, we love them all! 
Step 2: Paint the jars. We used spray paint to create an ombre effect by spraying layers, and also used some crumpled up newspaper to dab on the white acrylic paint. Use your imagination! Let them dry before you add your greens.
Step 3: Add greens and festive twine for that finishing touch!


Ta-dah! Super simple right? Get ready to fill your house with these green-filled jars, decorate for holiday parties or gift them to family and friends. Check back next week to see our next Christmas DIY — You won't want to miss it!

#rusticupyourhome

DIY: Christmas Tree Terrarium

Monday, December 14, 2015

Because getting ready for the holiday season always involves decorating every nook and cranny of the house, we’re going to be featuring a different DIY every week until Christmas! So now that you got your craft pants on from our Cinnamon Stick Coaster DIY, get ready for more holiday decorating fun with this adorable Christmas Forest Terrarium!

Lots of this year’s Christmas decor is reminiscent of 1950’s holiday decor—the gaudy, the colorful, and all-around FESTIVE. One of our favorite Christmas trends this year are the colorful little bristle trees! You’ve probably seen them at Target, and stopped to drool over the poppin’ colors like we have all too many times. This quick and cute DIY is our ode to the EVERgreen, EVER stylish bristle tree.


MATERIALS:
+ Bristle brush trees (we got ours at JoAnn Fabrics)
+ Glass mason jar with lid
+ White fabric or stuffing
+ Fabric or hot glue
+ Baker's twine (optional)

Step 1: Glue your fabric or stuffing onto the inside of your lid. This will be the "snow" of your winter jarscape. Next, add some glue to the bottom of your mini trees.

Step 2: Arrange your mini trees in the lid, placing the "snow" around them.


Step 3: Once your forest is planted, screw that lid on the jar, and finish it off with some Baker's twine if you really want a festive look.


This little terrarium makes an awesome table centerpiece, or even a great gift for all your friends! Craft along with us, and share your DIYs on social media using #rayandablog— we can’t wait to see your crafts!


#niftyfiftieschristmas

DIY: Cinnamon Stick Coasters

Monday, December 7, 2015

Because getting ready for the holiday season always involves decorating every nook and cranny of the house, we’re going to be featuring a different DIY every week until Christmas! So get your crafty pants on, and let’s get started!
Nothing screams Christmas more than the sweet smell of cinnamon filling the house. We’re sharing this super simple DIY that only requires two materials. Cinnamon sticks and twine. See below for instructions on how to make this fun DIY perfect for the holidays!


MATERIALS:

+ Cinnamon sticks
+ Baker's twine (or any string will do!)

Step 1: Line up your cinnamon sticks so they're as level as can be, then tie a knot on the first stick, securing the string before you start weaving.

Step 2: Start weaving the string under, over, (under, over...) the cinnamon sticks. Once you reach the last one, loop around the bottom and weave the other way.

Step 3: When you reach your original knot, tie the two ends together. Repeat on other side of the cinnamon sticks.

Now you have a cute, festive decoration and a fragrant scent to fill your home as you set that hot cup of coffee on your new coaster.


Sidenote: Isn't coffee with creamer swirls the most fascinating, beautiful thing, or is is just me?


Oh yeah! These coasters also look super cute with a candle burning on them. When the candle gets warm, you just might smell some cinnamon. Last week we went to a pop-up holiday shop, and Alisa bought this candle from Zoet Bathlatier, an artisanal candle and soap-maker. Do check out her website and her etsy shop—these would make great Christmas gifts with a coaster!

Use these cinnamon coasters with your hot tea to give off a rich, cinnamon scent, or use them for your holiday decoration! Craft along with us, and share your coasters on social media using #rayandablog— we can’t wait to see your crafts!


#spiceitup

DIY: Gold-Dipped Pinecone Garland

Monday, November 9, 2015

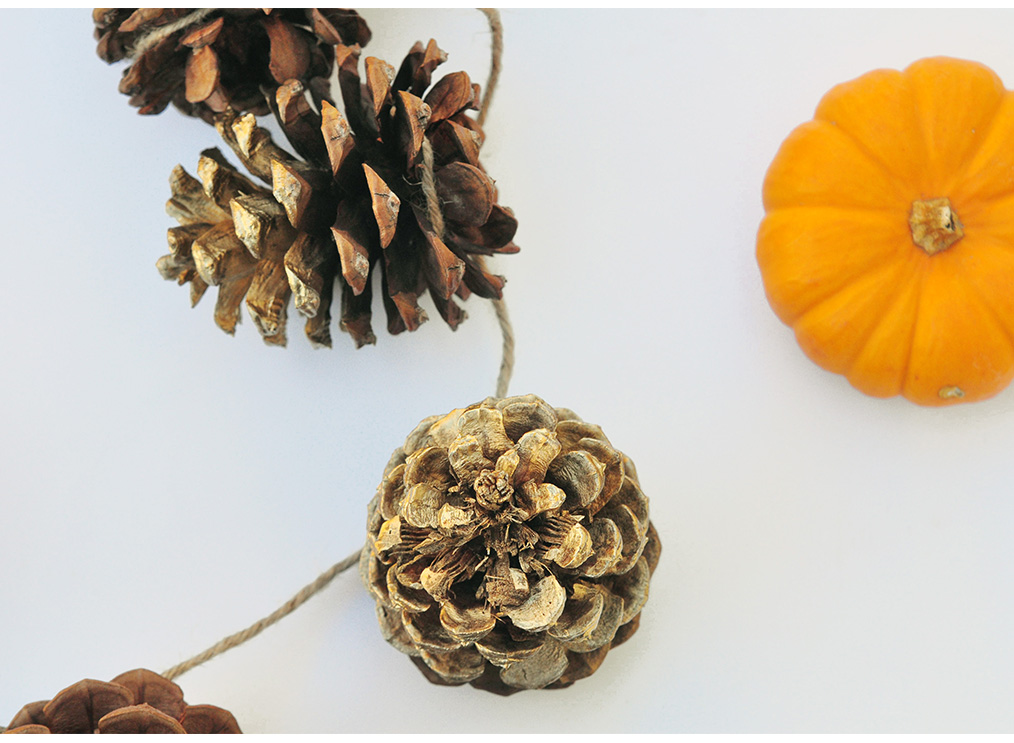
Today we had an epiphany while shopping… PINECONES. What can we do with pinecones? Spray them gold and hang them up around the house! So that’s where this DIY came from. Just in time for the holidays, this is a super simple project. These three supplies will leave your house feeling very festive. We recommend buying the scented pinecones because they double as air fresheners!


MATERIALS:

+ Pinecones
+ Gold spray paint
+ Twine


1. Gather your pinecones (we got ours at Wal-Mart for under $5!)


2. Grab your spray paint, and spray the top half of each pinecone. Don't worry if it isn't exactly halfway— ombre is totally cool.

3. Once the pinecones are dry, take some twine and tie a knot around the fat part of the pinecone, spacing them out equally among the string.


Voila! This garland looks especially great on a fireplace mantle, but equally as cool on your wall, over your desk, heck maybe even in your car. Go nuts, and happy fall!

#cheaperthananthro

DIY: Photo Easel

Thursday, August 6, 2015

Want a unique and fun way to show off your favorite Instagram photos at home or in the office? This DIY project is the perfect way to display your funny cat pictures, dreamy vacation photos, or trendy city pics.


M A T E R I A L S


Wooden easel, 4x4 artist panel, spray paint, Glue Dots, Instagram photos


S T E P   0 1 

Spray paint the wooden easel. Be sure to let it dry in between coats


S T E P   0 2
Remove four Glue Dots from the box. Apply Glue Dots to each corner of the artist panel


S T E P   0 3
Carefully place the photo on top of the Glue Dots keeping the edges lined up, and gently press down on each corner of the artist panel.


V O I L A !
This DIY was in collaboration with Renée Nicolo Photography who provided the photography for our first DIY. Be sure to check her out!


#DIYyourlife