Showing posts with label getcrafty. Show all posts

DIY: Plywood Letterboard

Friday, January 13, 2017


You've all seen the trendy letter boards and light boards from Letterfolk and Heidi Swapp, and don't get us wrong, they're pretty awesome. I mean, they're what inspired us to create a hybrid of the two!


You'll also need some transparency sheets, sandpaper and a pair of scissors.

Step 1. Take your dowels, and measure them against your plywood board, marking the width with a pencil. 

Step 2. Cut the dowels with a handsaw or chop saw (or a very, very industrial pair of clippers). Sand the ends lightly until smooth. 

Step 3. Using some E6000 glue, glue your dowels onto the board, spacing equally depending on how many lines of text you want. 

Step 4. Paint your plywood board and dowels white (or whatever color your little hear desires) and let that dry. Do a second or third coat if you think it needs it.

Step 5. Start by cutting your transparency sheets into strips that fit in between your dowels. Then place the letters onto the strips you just cut, leaving enough space in between letters for equal spacing.


Step 6. Once you have all the letters cut out, time to play!


Now it's time to think of some snarky (or cute) quotes, and put 'em on display!

We'd love to see your own take on this DIY, so if you make it, share it! Tag your projects with #rayandablog

#sayitwithwords

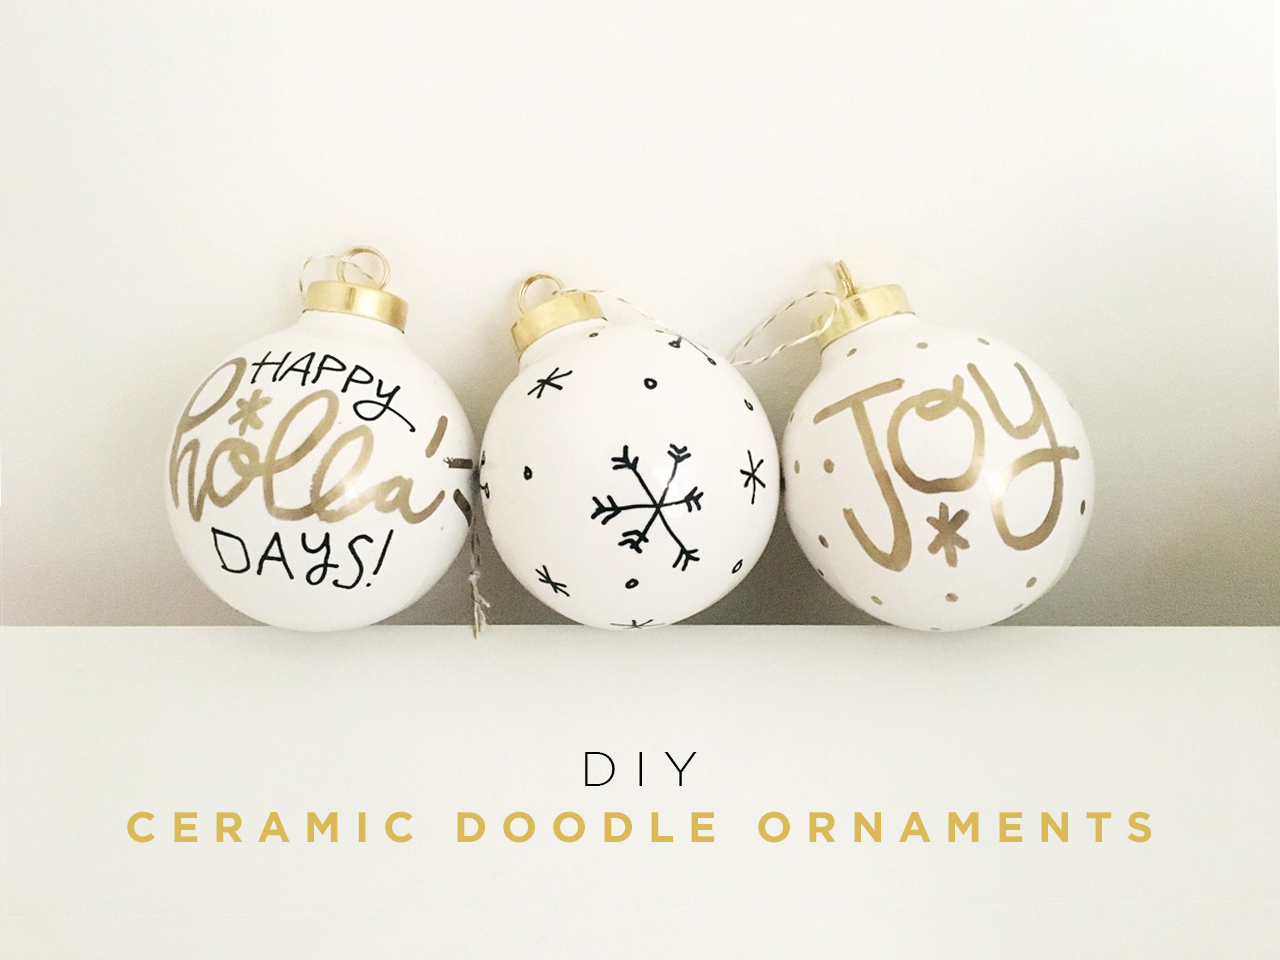
DIY CERAMIC DOODLE ORNAMENTS

Wednesday, December 14, 2016


I don't know about you, but we've been making homemade ornaments since we were in grade school, and let's face it– they weren't all Instagram worthy to put it lightly. Now that we're older and can hold a marker the correct way, it's time to revisit the handmade ornament. 


All you'll need for this one is some paint pens and baker's twine. Doodle a festive word, some classic snowflakes, or maybe even a sassy holiday phrase. The possibilities are endless, and these ornaments are super cheap so you don't have to limit your imagination!


And it wouldn't be a DIY without Butternut, who turns out to be quite the natural model. Not currently taking any gigs, but one day he'll make it big. Until then, happy holidays, and happy crafting!

We'd love to see your creations– share them on Instagram and tag us @rayandablog

#doodlealltheway

DIY Mini Pumpkins (and a giveaway!)

Saturday, October 22, 2016


It's just something about this time of year that makes us want to buy all the pumpkins. During October it's easy to spend more money on said pumpkins than on food. It's not sad– it's for the blog folks...

Our mission– take all the cool pinned ideas we've seen and put our own twist on them! And let's face it... no one really wants to dump out pumpkin guts, so these are all no cutting-no gluing-sewing-no crying-required.


A little bit of spray paint goes a long way. That's the easiest way to transform your pumpkin from mehhh to glam. Stick on some letter stickers, and you've reached a whole new level my friend. 

Sharpies are among the best inventions ever known to mankind. With a little imagination and a steady hand, (hold on the coffee before you do these, we learned the hard way) you'll have a killer customized pumpkin in no time at all!

We're also hosting a little giveaway– 3 lucky winners will each receive one of these customized pumpkins from yours truly, but you have to...

1. Follow us on Instagram (@rayandablog)
2. Comment on our post (this is where we'll pull your name!) 
3. Like us on Facebook! And we love your comments, so send them our way!

Got it? We can't wait to see your pumpkin makeovers, and select our winners! You have until next Wednesday, October 26 to enter!

#paintyopumpkin

DIY: Re-Purposed Altoid Tins

Friday, March 25, 2016

We all know and love that notorious, classic green and gold tin known as Altoids, but what happens when those strong little mints are gone? Re-use it, people! We have three practical, easy-peasy ways to re-use your own collection of Altoids tins.

1. The Lil' Commuter's Travel Kit

Whether you take 3 trains a day, or drive 20 minutes to work, this little kit will have everything you need! Keys, change, bus fare, headphones, and a phone charger cord— you'll never be ill-prepared again! Toss it all in the tin, and throw it in your purse, and you're ready to go!


2. The Lil' Primp and Pamper Emergency Kit

We've all been in the situation where our hair just won't cooperate and we need a hair tie, or when our lips are (in the words of Napoleon Dynamite) FREAKING CHAPPED AND NEED CHAPSTICK. These little mint tins are perfect sizes for your everyday-hair and face-fixer needs!

Yes, that is cat chapstick, stop judging us...

3. The Lil' Sewing Kit (no, Grandma didn't make this for us)

Sewing seems to be a skill of the past, but it's time to put the needle to the thread and fix that little hole in your favorite sweater yourself. Keep some extra pieces of fabric or patches, some needles and a few mini thread spools in the tin so you'll never have to ask your mom to sew it for you again. Trust us, she'll thank you.


Our cats have sure been into our DIY's lately... that or they just want to be famous. Divas... 


#craftinacan

DIY: KRAFT PAPER BAG GIFT TAGS

Tuesday, March 15, 2016


Sometimes the best ideas spark when you're rummaging through your college craft boxes... literally! This is the perfect way to recycle brown kraft paper bags and use your excessive amount of paint color swatches that you've been hoarding (admit it, you know you do...) Put together this DIY in less than 5 minutes for the perfect finishing touch to your gift bags or boxes!

MATERIALS:

+ Brown kraft paper bag
+ Gift tag punch
+ Paint color swatches
+ Hole punch
+ Scissors
+ Glue stick
+ Marker
+ A cat or two to keep you company (optional, but highly recommended)


Step 1: Use the gift tag punch on the side of the kraft paper bag. One punch on the side should get you two or three tags at once from the layers.
Step 2: Cut strips from the paint color swatches or any other fun shapes! Glue these onto the tags.
Step 3: Use the hole punch at the top of the tags and customize with your marker!


Use fun colors for birthdays and colors coordinating with holidays to have gift tags for any occasion! We would love to see your creations use #rayandablog so we can see your take on this DIY!

P.S. - This DIY could not have been possible without the company of cats Skipper and Binx. We couldn't have done it without their constant interruptions of playing and laying on literally everything.

#getyourkrafton

New Year Motivation

Tuesday, January 5, 2016

It's never a new year without making a few resolutions that, let's face it, we'll probably forget all about in the next few weeks. 

Use this print as your phone wallpaper, office art or just a reminder that you've got this!

#newyearnewyou

DIY: Rustic Painted Mason Jars

Monday, December 21, 2015

It's week three of our Christmas DIY countdown! This super simple DIY will give your home a rustic holiday look right away. While last week’s craft featured a DIY Christmas tree terrarium, this week we are using materials that you can totally find in your own home!
Mason jars always seem to be popping up all over Pinterest, crafts stores and even our own homes, so we decided to feature them this week in our DIY!

MATERIALS:

+ Mason Jar
+ Acrylic paint/spray paint
+ Twine
+ Fresh greens (you can get these from the trees in your backyard or your neighbor’s backyard, or at your local pop-up Christmas tree farm! Tip: Be sure to ask before creeping in anyone's yard to cut their trees...)

Step 1: Collect your jars — Big and small, we love them all! 
Step 2: Paint the jars. We used spray paint to create an ombre effect by spraying layers, and also used some crumpled up newspaper to dab on the white acrylic paint. Use your imagination! Let them dry before you add your greens.
Step 3: Add greens and festive twine for that finishing touch!


Ta-dah! Super simple right? Get ready to fill your house with these green-filled jars, decorate for holiday parties or gift them to family and friends. Check back next week to see our next Christmas DIY — You won't want to miss it!

#rusticupyourhome

SEASONS GREETINGS (CARDS)

Thursday, December 17, 2015

The best way to complete a gift? With a well-designed holiday card! We’re crazy about all the Christmas cards that have been flooding the Internet this year, and we’re showing you our favorite cards this season from extremely talented designers and illustrators. Check ‘em out to find the perfect card for anyone in your life!


WORTHWHILE PAPER


Have a favorite? Show some love for your favorite paper goods designers below in the comments!

#tisthegreetings

DIY: Christmas Tree Terrarium

Monday, December 14, 2015

Because getting ready for the holiday season always involves decorating every nook and cranny of the house, we’re going to be featuring a different DIY every week until Christmas! So now that you got your craft pants on from our Cinnamon Stick Coaster DIY, get ready for more holiday decorating fun with this adorable Christmas Forest Terrarium!

Lots of this year’s Christmas decor is reminiscent of 1950’s holiday decor—the gaudy, the colorful, and all-around FESTIVE. One of our favorite Christmas trends this year are the colorful little bristle trees! You’ve probably seen them at Target, and stopped to drool over the poppin’ colors like we have all too many times. This quick and cute DIY is our ode to the EVERgreen, EVER stylish bristle tree.


MATERIALS:
+ Bristle brush trees (we got ours at JoAnn Fabrics)
+ Glass mason jar with lid
+ White fabric or stuffing
+ Fabric or hot glue
+ Baker's twine (optional)

Step 1: Glue your fabric or stuffing onto the inside of your lid. This will be the "snow" of your winter jarscape. Next, add some glue to the bottom of your mini trees.

Step 2: Arrange your mini trees in the lid, placing the "snow" around them.


Step 3: Once your forest is planted, screw that lid on the jar, and finish it off with some Baker's twine if you really want a festive look.


This little terrarium makes an awesome table centerpiece, or even a great gift for all your friends! Craft along with us, and share your DIYs on social media using #rayandablog— we can’t wait to see your crafts!


#niftyfiftieschristmas

DIY: Gold-Dipped Pinecone Garland

Monday, November 9, 2015

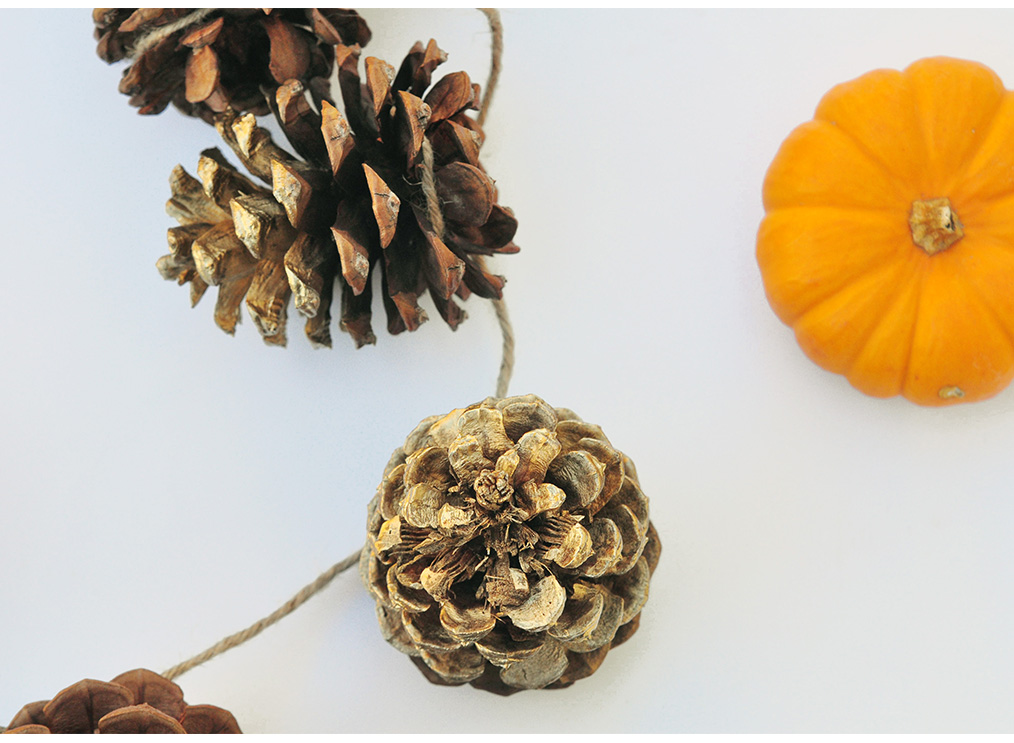
Today we had an epiphany while shopping… PINECONES. What can we do with pinecones? Spray them gold and hang them up around the house! So that’s where this DIY came from. Just in time for the holidays, this is a super simple project. These three supplies will leave your house feeling very festive. We recommend buying the scented pinecones because they double as air fresheners!


MATERIALS:

+ Pinecones
+ Gold spray paint
+ Twine


1. Gather your pinecones (we got ours at Wal-Mart for under $5!)


2. Grab your spray paint, and spray the top half of each pinecone. Don't worry if it isn't exactly halfway— ombre is totally cool.

3. Once the pinecones are dry, take some twine and tie a knot around the fat part of the pinecone, spacing them out equally among the string.


Voila! This garland looks especially great on a fireplace mantle, but equally as cool on your wall, over your desk, heck maybe even in your car. Go nuts, and happy fall!

#cheaperthananthro